


An airway that is blocked or not properly opened can prevent air from reaching the lungs, making airway opening a critical first step when assessing someone who may not be breathing normally. Knowing the correct sequence matters because simply moving the head or mouth without following the appropriate technique may not adequately open the airway.
Opening the airway correctly ensures that rescue breaths reach the lungs effectively. For most unresponsive adults, the head-tilt/chin-lift is the standard technique when a head or neck injury is not suspected. When a head or neck injury is suspected, a trained rescuer may use the jaw thrust without extending the head. Airway management should be performed quickly and carefully as part of a broader CPR response.
In this blog, we’ll walk through both airway-opening techniques step by step, how they differ for children and infants, what to do after opening the airway, and cover common mistakes to avoid when managing the airway during CPR.
Why Airway Management Is Necessary When Performing CPR
Airway management is necessary during CPR because an unconscious person’s airway can become blocked when the muscles in the throat relax, allowing the tongue to fall backward and obstruct the passage of air. This can make it difficult for oxygen to reach the lungs, even when rescue breaths are given correctly. Opening the airway helps create a clear passage for ventilation and is particularly important because an unconscious person may no longer be able to maintain their airway on their own.
CPR involves giving compressions along with rescue breaths. Chest compressions help circulate blood throughout the body, while rescue breaths provide oxygen when ventilation is indicated. Keeping the airway open allows these components to work together effectively. However, airway management should be performed efficiently to avoid unnecessary interruptions to chest compressions, which are critical during cardiac arrest.
What Method Is Used to Open the Victim’s Airway
The two main airway-opening techniques used in basic CPR guidance are the head-tilt/chin-lift and the jaw thrust. The head-tilt/chin-lift is generally used when there is no reason to suspect a head or neck injury. The jaw thrust is generally considered when a head or neck injury is suspected and should be performed by a trained rescuer.
Head-Tilt/Chin-Lift Technique
The head-tilt/chin-lift is one of the most commonly used techniques for opening the airway of an unresponsive adult when cervical spine injury is not suspected. It works by gently repositioning the head and lower jaw, helping move the tongue away from the back of the throat. This technique is generally appropriate when there is no suspected cervical spine injury.
How to Perform the Head-Tilt/Chin-Lift
Step 1: Position Yourself Beside the Person
Kneel or position yourself beside the person’s head and shoulders. This gives you comfortable access to both the forehead and chin while allowing you to maintain control of the airway.
Step 2: Place One Hand on the Forehead
Place the palm of one hand on the person’s forehead. Use this hand to gently tilt the head backward. Your movement should be controlled rather than forceful.
Step 3: Place Your Fingers Under the Chin
Use the fingers of your other hand to grasp the bony part of the person’s chin. Avoid pressing deeply into the soft tissue underneath the chin or neck because pressure in this area can interfere with the airway.
Step 4: Tilt the Head Back
Gently press down on the forehead to tilt the person’s head backward. This movement helps reposition the tongue and other soft tissues so that they are less likely to block the airway.
Step 5: Lift the Chin
At the same time, lift the chin upward and forward using your other hand. The combination of head tilt and chin lift helps create a clearer passage through the upper airway.
Step 6: Check the Airway
Once the head and chin are positioned, check whether the airway appears open. If rescue breaths are indicated and you are trained to provide them, maintain this position while providing the breaths.
Jaw Thrust Technique
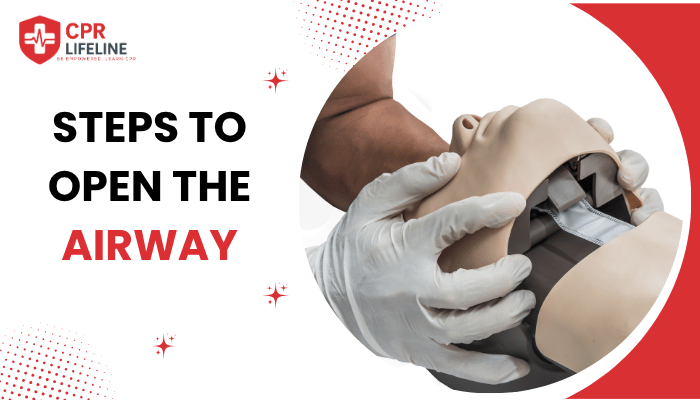
The jaw thrust is an airway-opening technique that is used when a head or neck injury is suspected. The technique moves the lower jaw forward, which can help move the tongue away from the back of the throat. For a person with suspected trauma, minimizing unnecessary head and neck movement can be important.
How to Perform the Jaw Thrust
Step 1: Position Yourself at the Person’s Head
Position yourself at the head of the person so that you can control the jaw while maintaining the head and neck as still as possible. This position gives you better control of the airway during the maneuver.
Step 2: Keep the Head and Neck Still
Avoid tilting, rotating, or extending the person’s head. The purpose of the jaw thrust in a trauma situation is to help open the airway while minimizing unnecessary movement of the head and neck.
Step 3: Place Your Hands on the Jaw
Place your hands on either side of the person’s head and position your fingers behind the lower jaw. Your grip should be controlled and firm enough to move the jaw without applying excessive pressure.
Step 4: Move the Jaw Forward
Gently move the lower jaw forward and upward. This movement helps pull the tongue away from the back of the throat and may create a clearer passage for air.
Step 5: Avoid Extending the Head
Keep the head and neck in a neutral position while moving the jaw. Do not tilt the head backward when performing a jaw thrust specifically because of suspected head or neck trauma.
Step 6: Check Whether the Airway Is Open
After positioning the jaw, check whether the airway appears open. If you are trained to provide rescue breaths, give the appropriate ventilation and look for visible chest rise.
What Should You Do After Opening the Airway?
After opening the airway, check whether the person is breathing normally. Look for normal chest movement and listen or feel for breathing for no more than 10 seconds. Occasional gasping or irregular breaths are not considered normal breathing and should not be mistaken for effective breathing. The next step depends on whether the person is breathing normally or not.
If the Person Is Breathing Normally
If the person is unconscious but breathing normally, maintain an open airway and continue to monitor their breathing. If there is no suspected spinal injury, turn the person onto their side with their head positioned so the airway remains open. The recovery position helps prevent the tongue or fluids such as saliva or vomit from blocking the airway while you wait for emergency medical help.
Continue checking their breathing until emergency medical help arrives. If their breathing becomes abnormal or stops, be prepared to begin CPR.
If the Person Is Not Breathing Normally
If the person is not breathing normally after you open the airway, treat this as a possible cardiac arrest and begin the appropriate emergency response and CPR.
The 2025 American Heart Association (AHA) Guidelines recommend maintaining a patent airway and providing effective ventilation during adult cardiac arrest. If you are trained to provide rescue breaths, give them while continuing chest compressions with as little interruption as possible. If you are not trained or are unable to provide breaths, follow the emergency dispatcher’s instructions and start chest compressions.
How Does Airway Opening Differ for Babies and Children?
The basic airway-opening technique is the same for infants and children, but positioning should be adjusted to the child’s size and anatomy. The 2025 American Heart Association (AHA) and American Academy of Pediatrics (AAP) guidelines recommend a head-tilt/chin-lift when a cervical spine injury is not suspected. If a cervical spine injury is suspected, use a jaw thrust without head tilt.
For an Infant
For an infant, use a gentle head-tilt/chin-lift when there is no suspected cervical spine injury. An infant’s airway is small and delicate, so excessive head extension can make it more difficult to maintain an open airway. Use only enough head movement to establish an effective airway rather than forcing the head into a specific position. When lifting the chin, use the bony part of the chin rather than pressing on the soft tissue beneath the jaw.
For a Child
For a child, use the head-tilt/chin-lift when a cervical spine injury is not suspected. Children vary considerably in size and anatomy, so there is no single head angle that works for every child. Use gentle positioning and avoid excessive head extension or forceful movement.
Common Mistakes When Opening the Airway During CPR
Opening the airway correctly is an important part of effective CPR, but simple mistakes can make it harder to establish or maintain an open airway. Understanding common errors can help rescuers respond more efficiently during an emergency.
Here are some common mistakes to avoid when opening the airway during CPR.
1. Using the Wrong Airway Technique After Trauma
A common mistake is automatically using the head-tilt/chin-lift when there is a known or suspected head or neck injury. Trauma can create concerns about movement of the cervical spine, and extending the head in this situation may not be appropriate. If the airway cannot be adequately opened with a jaw thrust and ventilation cannot be provided, establishing an effective airway becomes the priority.
2. Blindly Sweeping the Mouth
Another mistake is putting fingers into an unconscious person’s mouth without being able to see an obstruction. This can push an object deeper into the airway instead of clearing it. Look inside the mouth first, and only remove an obstruction if it is clearly visible and can be safely reached.
3. Spending Too Much Time on Airway Management
Spending too much time trying to perfect an airway maneuver can delay chest compressions, which are critical during cardiac arrest. If another trained rescuer is present, switching between rescuers helps both continue smoothly and without unnecessary pauses.
4. Attempting Advanced Airway Procedures Without Training
Advanced airway procedures require specialized training and equipment. Attempting them without the appropriate skills can cause harm and delay essential CPR. Lay rescuers should stay within the techniques they have been taught, while healthcare professionals should use advanced airway devices only when appropriately trained.
A Clear Airway Is the First Step to Saving a Life
Knowing how to open the airway is an important part of effective CPR when rescue breaths are required. Use the head-tilt/chin-lift for an unresponsive adult when no head or neck injury is suspected. If trauma is suspected, a trained rescuer may use the jaw-thrust maneuver while minimizing movement of the head and neck. Once the airway is open, provide rescue breaths as appropriate and resume chest compressions promptly. Avoid unnecessary interruptions, blind finger sweeps, or techniques beyond your level of training.
Practical CPR training is the best way to learn the correct techniques and develop confidence in an emergency. Regular CPR training can help ensure that you know what to do when someone needs immediate assistance. If you’re looking to get certified, CPR Lifeline offers AHA-certified CPR, BLS, ACLS, and PALS courses with same-day eCard certification.
Faqs

Chris Peters
Chris Peters is a certified American Heart Association instructor and firefighter since 1996 with over 30 years of emergency response experience. After answering thousands of 911 calls, he founded CPR Lifeline to provide AHA-certified training that transforms bystanders into confident lifesavers who act decisively when seconds count