
Placing an unresponsive person in the recovery position can help protect their airway while you wait for emergency medical care. The recovery position is used when someone is unresponsive or has reduced responsiveness but is breathing normally. Turning them onto their side helps keep the airway open and allows saliva, vomit, or other fluids to drain from the mouth.
Before moving someone, you should always check whether they are breathing normally and consider whether they may have an injury that makes movement unsafe. If they are not breathing normally or are only gasping, you shouldn’t use the recovery position. You should start CPR and seek emergency medical help immediately.
This blog covers what the recovery position is, when to use it, step-by-step instructions, and what to change for infants and people with a suspected spinal injury.
What Is the Recovery Position?
The recovery position is a first aid technique for placing an unconscious or unresponsive person who is breathing normally on their side. The technique is also commonly called the lateral recovery position or side-lying position. It provides a stable posture that helps the person maintain a clear airway while they wait for medical assistance.
When a person loses consciousness, they may not be able to control their head, swallow normally, or clear fluids from their mouth. Lying on the side helps keep the mouth in a downward-facing position, allowing saliva or other fluids to drain rather than remain around the airway. This makes the recovery position useful when someone is breathing normally but cannot safely maintain their own posture.
When Should You Use the Recovery Position?
The recovery position may be appropriate when a person has decreased alertness and is breathing normally, particularly when the cause is not traumatic. The 2024 AHA and American Red Cross first-aid guidelines consider a recovery, or side-lying, position reasonable in this situation.
You should consider the recovery position when:
- The person has decreased responsiveness or is not fully alert.
- The person is breathing normally.
- CPR is not currently required.
- There is no obvious injury that makes rolling the person unsafe.
- You need to help maintain an open airway while waiting for emergency medical assistance.
The recovery position can help reduce the risk of airway obstruction and aspiration and may make it easier for fluids to drain from the mouth.
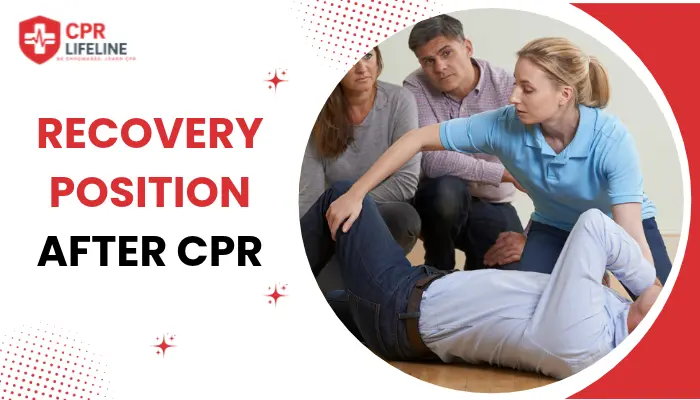
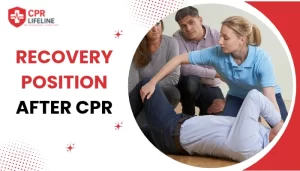
Recovery Position After CPR
If a person regains normal breathing after CPR but remains unresponsive, the recovery position may be appropriate if there is no suspected injury that makes moving them unsafe. Place the person on their side to help maintain an open airway and allow fluids to drain from the mouth. Continue to monitor their breathing and responsiveness while waiting for emergency medical help.
If their breathing becomes abnormal, stops, or changes to occasional gasping, place them on their back and resume CPR. The recovery position does not replace medical care. Anyone who has required CPR should receive emergency medical evaluation, even if they regain normal breathing.
How to Put Someone in the Recovery Position
The exact technique can vary depending on the person’s age, size, injuries, and circumstances. The steps below describe a commonly used approach for an adult or child over 1 year who is unresponsive but breathing normally, and has no obvious injury that would make movement unsafe.
Step 1: Check the Person
Make sure the area is safe before approaching. Check whether the person responds when you speak to them and gently stimulate them, then check whether they are breathing normally. If they are not breathing normally or are only gasping, do not place them in the recovery position. Activate emergency medical help and begin CPR.
Step 2: Position the Near Arm
Kneel beside the person and place the arm closest to you at a right angle to their body. Bend the elbow so the hand points upward with the palm facing up. This keeps the arm in a stable position during the roll.
Step 3: Position the Far Arm and Leg
Bring the person’s other arm across their chest and place the back of their hand against the cheek closest to you. Keep their hand against their cheek during the roll. Then bend the knee farthest from you, keeping the foot flat on the ground. The bent knee will help you turn the person without pulling on their arm.
Step 4: Roll the Person Onto Their Side
Use the bent knee to gently pull the person toward you while keeping their hand against their cheek. Roll them in one controlled movement until they are lying on their side. Avoid pulling directly on the arm or twisting the neck unnecessarily.
Step 5: Make the Position Stable
Adjust the upper leg so the knee remains bent and rests in front of the body. This helps prevent the person from rolling onto their back. Check that their body is securely supported on its side without placing unnecessary pressure on the chest.
Step 6: Position the Head and Airway
Gently adjust the head so the airway remains open and the mouth is angled downward. This helps saliva, vomit, or other fluids drain from the mouth rather than collect around the airway. Make sure the mouth and nose are clear and are not pressed against the ground. Avoid forcing the neck into an extreme position.
Step 7: Continue Monitoring
Stay with the person and continue checking their breathing while waiting for emergency medical assistance. If their breathing becomes abnormal, stops, or changes to occasional gasping, turn them onto their back and begin CPR.
Recovery Position Variations: Infants and Suspected Spinal Injury
The standard technique above is intended for adults and children over 1 year. Infants and people with possible spinal injuries require different considerations because the usual rolling technique may not be appropriate.
Infants Under 1 Year
Infants require gentle, supported positioning because of their small size and developing anatomy. For an infant who is unresponsive or has decreased responsiveness but is breathing normally and has no suspected injury:
- Support the infant’s head and neck as you gently turn them onto their side.
- Keep the head and neck in a neutral position, avoiding excessive forward or backward movement.
- Position the infant so they are partly turned onto their side, rather than lying completely on their back.
- Keep the upper leg bent forward to help support the infant and prevent them from rolling onto their stomach.
- Turn the face to the side and make sure the mouth and nose remain clear so the airway is not blocked.
Continue monitoring the infant’s breathing and responsiveness while waiting for emergency medical assistance. If they are not breathing normally or are only gasping, begin infant CPR instead.
When a Spinal Injury Is Suspected
If a person has a possible spinal injury following a significant fall, collision, or blow to the head, neck, or back, do not routinely roll them into the recovery position. If they are breathing normally and their airway is clear, leave them where they are and minimize movement.
- Keep the head, neck, and torso aligned as much as possible.
- Do not straighten the neck or repeatedly reposition the person.
- Monitor their breathing and responsiveness while waiting for emergency help.
- Keep the person still unless movement is necessary to deal with an immediate danger or life-threatening problem.
If the airway becomes blocked or the person needs CPR, airway management and resuscitation take priority. You should move them only as much as necessary to provide care, while minimizing twisting or bending of the spine.
The Recovery Position Keeps the Airway Clear
The recovery position is appropriate when a person is unresponsive or has reduced responsiveness but is breathing normally. The person should be placed on their side with the head and mouth positioned to help keep the airway clear, while their breathing continues to be monitored. The left or right side can generally be used, although certain situations, such as pregnancy or an injury, may affect which side is more suitable. Infants and people with a suspected spinal injury also require additional precautions rather than simply following the standard adult technique.
Knowing what to do in an emergency is valuable, but hands-on practice can make it easier to respond with confidence when those skills are needed. CPR Lifeline provides AHA-certified CPR, BLS, ACLS, and PALS training, combining online learning with hands-on skills practice to help people prepare for real emergency situations.
Faqs

Chris Peters
Chris Peters is a certified American Heart Association instructor and firefighter since 1996 with over 30 years of emergency response experience. After answering thousands of 911 calls, he founded CPR Lifeline to provide AHA-certified training that transforms bystanders into confident lifesavers who act decisively when seconds count