


In cardiac emergencies, every second counts and how CPR is performed can directly influence a person’s chance of survival. According to the American Heart Association, over 350,000 out-of-hospital cardiac arrests occur annually in the United States alone, and nearly 90 percent are fatal without rapid intervention. That means for the vast majority of victims, their best and often only hope lies in the hands of a bystander who knows what to do.
In this blog, we discuss the 7 steps of CPR that every layperson must know to deliver high-quality, guideline-aligned CPR before emergency help arrives. If your goal is to act decisively, reduce hesitation, and dramatically improve someone’s chance of survival, this guide gives you the clarity, confidence, and actionable steps you need.
What Is CPR, and Why Is It Important?
CPR i.e Cardiopulmonary resuscitation, is a lifesaving technique that is used when something stops breathing or the heart stops beating normally. This emergency medical condition can happen due to electric shock, heart attack, or drowning.
CPR is an important lifesaving technique that can make the difference between life and death when performed properly. In case of cardiac arrest, where the heart stops, with brains and vitals organs lacking oxygenated blood, immediate CPR can double or triple survival chances. Initiating CPR by manually pumping blood throughout the body and delivering oxygen until professional medical help arrives increases the chance of victims survival.
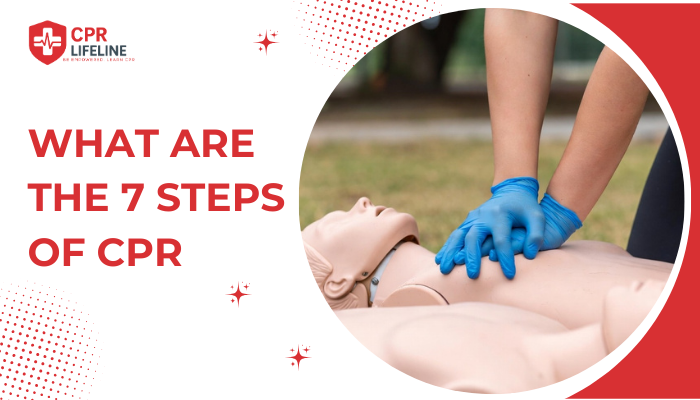
What Are the 7 Steps of CPR
Performing CPR properly in a step-by-step manner after cardiac arrest can double or triple the victim’s chance of survival. Below are the 7 steps of CPR that you should consider to boost a cardiac arrest victim’s survival chances immediately.
Step 1: Check the Scene for Safety
Before approaching to help the victim, make sure to check your surroundings for any hazards. Look for traffic, fire, or electrical wire danger, or unstable surface. Before helping the victims, your safety is more important, as any danger can worsen the situation further.
Make sure the area is safe for the victims and you. Move the victim only if there are unavoidable threats present. Otherwise, remove the hazard or wait for professional assistance. After ensuring safety, use personal protective equipment, gloves, and face shields to minimize exposure to bloodborne pathogens and reduce infection risk during rescue breathing.
Step 2: Check for Responsiveness
Check the responsiveness of the victim by tapping their shoulders firmly and shouting, “Are you okay?” Look closely for any response, such as body movement, eye movement, or speech. If the victim shows the response, CPR is not necessary, but further medical assistance may be needed.
If the victim has not shown any sign of response, then proceed to the next step immediately, as survival chances decrease with every passing second. For infants, use a gentle foot tap instead of shoulder tapping to assess responsiveness safely.
Step 3: Call 911
Before starting CPR to get blood flowing, it is essential to call 911 or instruct a bystander to call the emergency medical team. CPR is intended to keep a victim stable until medical help arrives, it doesn’t cure cardiac arrest or any underlying medical condition.
However, if the victim is a child, infant, or someone who likely collapsed due to drowning, choking, or drug overdose, start CPR immediately for about two minutes before calling 911. In these cases, the problem usually begins with a lack of oxygen, not a heart rhythm issue and early breath along with compressions can make a huge difference in those first few minutes.
Step 4: Perform Chest Compressions
Position the heel of one hand on the center of the chest, right between the nipples and place your other hand on top. Interlock your fingers, align your shoulders over your hands and keep your arms straight to apply downward force efficiently.
Deliver compressions hard and fast at a depth of at least 2 inches, not more than 2.4 inches for adults. Maintain a compression rate of 100 to 120 per minute and allow the chest to fully recoil after each push to ensure effective blood flow to the brain and heart.
For children. Compress about 2 inches using one or two hands. For infants, use two fingers and compress about 1.5 inches deep. The chest compression rate should be the same for all age groups.
Step 5: Open the Airway
After your first set of compressions, make sure the airway is open. Place the person flat on their back on a firm surface, then use the head-tilt chin-lift technique, i.e., gently tilt the forehead back with one hand while lifting the chin with the other. This simple maneuver helps shift the tongue away from the back of the throat, clearing the airway so air can flow more easily into the lungs.
Once the airway is open, quickly check for normal breathing by looking for chest rise, listening for breath sounds, and feeling for air on your cheek. Do this for no more than 10 seconds, and if the person isn’t breathing or is only gasping, move immediately to the next step of CPR. In cardiac arrest, time is brain and keeping blood moving is our top priority.
Step 6: Deliver Rescue Breaths
With the airway open, pinch the nose shut, make a full seal over the person’s mouth with yours, and give one breath that lasts about one second. Make sure to watch for a visible chest rise sign to confirm that the breath went in. If not, you may need to reposition the airway. Give a second breath the same way, then immediately return to chest compressions (30 more).
If you’re not trained, not comfortable, or don’t have a barrier device (like a face shield), you can perform hands-only CPR (compressions only) as well instead of Rescue Breaths. Hands-only CPR is recommended for adult sudden cardiac arrest and has been shown to improve the chance of survival in the first few minutes. For infants and children, rescue breaths remain very important in cases like drowning or overdose.
Step 7: Continue CPR Cycles
Keep performing cycles of 30 compressions and 2 breaths (or continuous compressions if you’re doing hands-only). Don’t stop the CPR cycles to check for breathing or a pulse unnecessarily, as that wastes your and victims precious time. Only pause the cycle if the person starts moving, breathing normally, or an AED becomes available and prompts you to stop.
When performing CPR with more than one rescuer, switch rescuers every two minutes to prevent rescuers from fatigue, which helps to increase compression quality. Remember, while switching rescuers, do not take more than 10 seconds and avoid unnecessary interruptions. Give continuous CPR unless professional help takes over, you are physically unable to continue, the scene becomes unsafe for CPR, or the person starts to move, breathe normally, or regain consciousness.
Do CPR Steps Differ Based on Age Groups?
While the core principles of CPR remain the same across all ages, there are important modifications based on whether you’re helping an adult, child, or infant. Understanding these differences ensures you deliver the most effective care for each victim.
Adults (Puberty and Older)
For adults, which includes anyone who has reached puberty or appears to be 8 years or older, use two hands for chest compressions. Position the heel of one hand on the center of the chest with the other hand on top, and compress at a depth of at least 2 inches but not exceeding 2.4 inches. The compression-to-breath ratio is 30:2, or you can perform continuous compressions if you’re doing hands-only CPR. Adults typically experience cardiac arrest due to heart rhythm problems, which is why hands-only CPR is effective for sudden cardiac arrest in this age group.
Children (Ages 1 to Puberty)
For children between the ages of 1 and puberty, use one or two hands, depending on the child’s size, compressing about 2 inches deep. The 30:2 compression-to-breath ratio still applies, but rescue breaths are especially important for children since their cardiac arrests often result from respiratory issues rather than heart problems. Conditions like drowning, choking, or severe asthma are common causes, which is why delivering oxygen through rescue breaths can make a critical difference in survival outcomes for pediatric victims.
Infants (Under 1 Year Old)
For infants under 1 year old, use only two fingers placed just below the nipple line to deliver compressions about 1.5 inches deep. The compression-to-breath ratio changes to 30:2 for a single rescuer, but if two trained rescuers are present, use a 15:2 ratio instead. When giving rescue breaths to an infant, cover both the nose and mouth with your mouth, and provide gentle puffs rather than full breaths to avoid over-inflating their small lungs.
Regardless of age, the compression rate remains consistent at 100 to 120 per minute, and full chest recoil between compressions is essential. Always remember that some CPR is better than no CPR, so even if you’re uncertain about the exact modifications, taking action can still save a life.
How an AED Boosts Survival Chances?
While CPR keeps blood flowing, an AED can actually restart the heart if it’s in a shockable rhythm (like ventricular fibrillation). For every minute that defibrillation is delayed, the chance of survival drops by 7–10%. That’s why using an AED as soon as possible is critical and why CPR training almost always includes AED instruction.
The good news? AEDs are intuitive. They provide clear voice instructions, analyze the heart automatically, and will only deliver a shock if needed. You can’t accidentally shock someone who doesn’t need it.
Common CPR Mistakes That Reduce Effectiveness
Even good rescuers make mistakes that compromise CPR quality. Being aware of these common errors helps you perform high-quality CPR and save a life when every second counts.
- Insufficient Compression Depth: It is one of the most frequent mistakes. Many rescuers don’t push hard enough, failing to reach the recommended 2 inches for adults. Compressions that are too shallow won’t generate adequate blood flow to vital organs. Don’t be afraid to use your body weight and push firmly on the center of the chest.
- Incorrect Hand Placement: Your hands should be positioned on the lower half of the breastbone, right between the nipples. Pressing too high, too low, or off to the side can cause injuries or fail to circulate blood properly.
- Not Allowing Full Chest Recoil: Not allowing the chest to rise between compressions fully prevents the heart from refilling with blood. After each compression, you should completely release pressure and let the chest return to its normal position before pushing again. Leaning on the chest between compressions is a common error that drastically reduces CPR effectiveness.
- Stopping Compressions Too Frequently: Frequent interruptions during CPR disrupt blood flow to the brain and heart. It should be kept to an absolute minimum, ideally under 10 seconds, and only when necessary, such as switching rescuers, delivering rescue breaths, or using an AED.
- Compressing at the Wrong Rate: Compressing either too fast or too slow reduces circulation efficiency. Aim for 100 to 120 compressions per minute, which is roughly the beat of the songs “Stayin’ Alive” by the Bee Gees or “Baby Shark.” Maintaining this steady rhythm ensures optimal blood flow.
- Giving Ineffective Rescue Breaths: This happens when the airway isn’t properly opened, or the seal around the mouth isn’t tight enough. Always use the head-tilt chin-lift maneuver before giving breaths, and watch for visible chest rise to confirm the breath went in.
- Rescuer Fatigue: Compression quality decreases significantly after just two minutes of continuous CPR. If possible, switch with another rescuer every two minutes to maintain high-quality CPR throughout the emergency. Regular CPR training and practice help minimize these mistakes and build the muscle memory needed to perform confidently under pressure.
CPR training equips individuals with the knowledge, confidence, and hands-on skills needed to respond effectively during cardiac emergencies. Trained responders are more likely to perform high-quality chest compressions, use rescue breaths correctly, and operate an AED efficiently, all of which significantly increase survival rates.
Equip Yourself with a Life Saving CPR Skills
Regular certification and refresher courses ensure that these lifesaving skills remain sharp and up to date with the latest guidelines. By learning the 7 steps of CPR, anyone can become a capable first responder, bridging the critical minutes before professional help arrives and giving victims the best chance of survival.
Strengthen your lifesaving skills and stay up to date with the latest guidelines by enrolling in CPR Lifeline’s AHA Blended Learning HeartCode courses. With comprehensive training in CPR, BLS, ACLS, and PALS, you’ll gain hands-on experience through realistic scenarios and build the confidence to act decisively when every second counts.
Faqs
Yes, anyone can perform CPR without formal training by providing hands-only compressions, especially in adult sudden cardiac arrest. Immediate action can save lives.
Continuous chest compressions without pausing are recommended when you are untrained in rescue breaths, during hands-only CPR, or when no immediate breathing support is available.
No, do not stop compressions to check breathing. Only pause briefly if the victim shows obvious signs of life or emergency responders arrive.
CPR (Cardiopulmonary Resuscitation) is the basic lifesaving technique of chest compressions and rescue breaths. BLS (Basic Life Support) includes CPR plus additional skills like AED use, airway management, and advanced interventions.
No, pausing CPR to check for a pulse is generally not recommended, as interruptions reduce blood flow. Continue compressions until professional help arrives or the victim shows clear signs of life.

Chris Peters
Chris Peters is a certified American Heart Association instructor and firefighter since 1996 with over 30 years of emergency response experience. After answering thousands of 911 calls, he founded CPR Lifeline to provide AHA-certified training that transforms bystanders into confident lifesavers who act decisively when seconds count