


In cardiac emergencies, high-quality cardiopulmonary resuscitation (CPR) is the most powerful intervention a responder can deliver before advanced care arrives. Every year, over 350,000 Americans experience cardiac arrest outside of hospitals, and fewer than 10% survive. The survival chances from cardiac arrest improve dramatically when CPR is performed promptly, with high quality cpr further enhancing outcomes. High quality cpr increases the chance of survival and neurological outcomes of sudden cardiac arrest patients.
Unlike basic CPR, high-quality CPR follows evidence-based guidelines from organizations like the American Heart Association (AHA). It prioritizes seven critical components, i.e., positioning, rate, depth, recoil, interruptions, ventilation, and more, to maximize blood flow to vital organs, particularly the brain and heart. Bystanders or first responders who master these elements can double or triple survival rates, turning a dire situation into one with real hope.
In this comprehensive blog, we discuss what high quality cpr means, its components, how to perform it and common mistakes when performing it. Whether you’re a first responder, healthcare professional, or workplace safety leader, understanding and implementing the core components of high-quality CPR is non-negotiable.
What is High-Quality CPR?
High-quality CPR refers to cardiopulmonary resuscitation that is based on scientific evidence to maximize blood flow to the brain and heart during cardiac arrest. Unlike basic CPR, high-quality CPR emphasizes precision, consistency, and measurable performance standards. It is defined by how effectively compressions are delivered, how interruptions are minimized, and how well ventilation supports circulation without causing harm.
The high-quality CPR goes beyond just pushing on the chest as it’s a precision-driven protocol that follows the latest guidelines from the American Heart Association (AHA) and other global resuscitation councils. It was found that high-quality CPR compared to basic CPR can increase the chance of neurological recovery by up to four times in a study done in Korea.
Core Components of High-Quality CPR
To achieve optimal outcomes, rescuers must focus on these seven core components of a high quality cpr. Each of these components directly affects patient survival, so they should be performed carefully without compromising on anything.
Safe, Supportive Positioning and Location
Before starting CPR, it is important to ensure the scene is safe and the patient is positioned correctly to minimize risk to both rescuer and victim. Scan the environment for hazards like traffic, fire, or crowds, and enlist bystanders to secure the area if needed.
Then, you should immediately place the victim on a firm, flat surface like the floor or ground to allow full chest recoil during compressions. You should avoid soft surfaces like beds or couches, as these can absorb the compression force and stop you from getting the depth you need. Once the victim’s back is in proper position, you should position yourself directly over the victim’s chest with your shoulders aligned above your hands. This alignment lets you use your body weight instead of just arm strength. Your knees should be close to the victim’s torso for stability.
Proper Chest Compression Depth
Maintaining a compression depth during CPR is crucial to ensure effective circulation of blood to the brain and vital organs. For adults, it is recommended to press the chest down at 2-2.4 inches(5-6 cm), creating enough pressure to pump blood to the brain and other vital organs. Shallow compressions may appear effective, but they fail to push enough blood to vital organs and do not provide the circulation needed to support survival during cardiac arrest.
Maintaining proper compression depth becomes even more critical for infants and children, as smaller body sizes require precise technique to avoid injury while ensuring effective circulation. For children, compression of at least one-third the depth of the chest should be applied, which equals about 2 inches. For infants (under 1 year), compression of at least one least one-third the chest depth, approximately 1.5 inches, should be applied.
You cannot accurately judge compression depth by feeling alone. So, it is always best to use real-time feedback devices to guide you to the correct depth and rate. Research done in 2021 showed these tools improve CPR quality in training and simulation settings, with some benefits in real-life resuscitation.
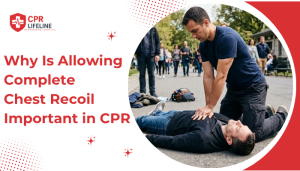
Complete Chest Recoil Between Compressions
A chest recoil between compressions during CPR is important as it allows the heart to expand and refill with blood fully. Without a proper chest recoil, the heart cannot fully expand and refill with blood, leading to reduced blood flow to the brain and vital organs, low cardiac output and less effective CPR.
In high-quality CPR, achieving complete chest recoil, i.e., returning the chest to its neutral position after each compression, is a core component alongside adequate rate, depth, and minimal interruptions. Rescuers should avoid leaning on the chest, use proper hand positioning, and switch compressors every 2 minutes to maintain fatigue free technique, ensuring optimal hemodynamics and maximizing survival chances.
Adequate Compression Rate
A compression rate of 100-120 per minute during CPR is recommended by the American Heart Association as it mimics the heart’s natural pumping rhythm, ensuring consistent blood flow to critical organs. Rates above or below the recommended rate can reduce the chance of survival of the victim, as this can directly impact chest recoil and compression depth.
Maintaining a steady rhythm is the key here, so you can use a metronome app or think of a song with the right tempo. It helps you stay within the recommended 100 to 120 compressions per minute.
Chest Compressions Fraction
Chest compression fraction, or CCF, simply means how much time you’re actually pushing on the chest versus stopping for breaths, pulse checks, or other activities. The more time you spend compressing, the better the blood flow to the brain. The AHA recommends keeping chest compressions fraction above 80% for high-quality CPR. Higher CCF means better blood flow and improved survival.
Continuous compressions matter more than perfect breaths in the first few minutes, so minimize interruptions as much as possible during CPR. Limit pauses to only what’s necessary, such as giving breaths, checking a pulse, or analyzing heart rhythm. Every pause interrupts blood flow to the brain, and even short breaks can reduce the effectiveness of CPR.
Effective Rescue Breaths Without Excessive Ventilation
While rescue breaths are critical in certain scenarios, too many or too forceful breaths increase intrathoracic pressure, reducing blood return to the heart. For a single rescuer, it is recommended to give two breaths after every 30 compressions. Each breath should last about one second and cause the chest to rise visibly. Once you see the chest rise, you should stop blowing. Use chest rise as your guide, since it shows that enough air is reaching the lungs without overdoing it.
For children and infants with two rescuers, use 15 compressions followed by two breaths to support better circulation. If you are not trained and do not feel safe giving breaths, or cannot get a good seal, compression-only CPR is still effective and far better than doing nothing.
Using an AED
Using an AED promptly during CPR is important as it analyzes heart rhythm and delivers a shock if needed to restore a normal heartbeat, potentially converting ventricular fibrillation or tachycardia back to a perfusable rhythm. Without proper AED use, shockable rhythms untreated can lead to prolonged cardiac arrest, irreversible brain damage from oxygen deprivation, failed resuscitation, and drastically reduced survival chances.
After you initiate CPR, you should use the AED as soon as it is available. Modern AEDs are specifically designed for any layperson to use during emergencies as they offer clear audio and visual instructions that guide you through pad placement, analysis, and shock delivery. The device automatically analyzes the victim’s heart rhythm and determines if a shock is needed. This removes the guesswork from the most critical treatment decision. Once the AED delivers a shock or advises no shock, immediately resume high-quality chest compressions.
How to Perform High-Quality CPR (Step-by-Step)
Performing high-quality CPR requires a combination of correct positioning, compression technique, effective ventilation, and minimal interruptions. Each step is essential to maintain blood flow and give the victim the best chance of survival until advanced care arrives.
- Check for Response: Tap the person’s shoulder firmly and shout, “Are you okay?” Check for normal breathing at the same time. If there’s no response and no breathing or only gasping, call emergency services immediately or direct someone nearby to do so.
- Position the Victim: Place the person on their back on a firm, flat surface. A hard floor is ideal. Soft surfaces like beds or couches absorb compression force and reduce effectiveness.
- Position Yourself Correctly: Kneel beside the victim at chest level. Place the heel of one hand on the center of the chest, between the nipples. Place your other hand on top and interlock fingers. Keep your elbows straight and position your shoulders directly over your hands.
- Begin Chest Compressions: Push down hard and fast, compressing the chest at least 2 inches (but no more than 2.4 inches). Compress at a rate of 100 to 120 compressions per minute. Use your body weight, not just your arms. Let the chest fully recoil between each compression. Do not lean on the chest.
- Give Rescue Breaths (if trained): After 30 compressions, give 2 rescue breaths. Tilt the head back slightly to open the airway. Pinch the nose shut, make a complete seal over the person’s mouth, and blow for about 1 second. Watch for the chest to rise. If untrained or uncomfortable, skip the breaths and continue compressions.
- Continue the CPR Cycle: Repeat cycles of 30 compressions and 2 breaths (or compressions-only if doing hands-only CPR). Switch rescuers every 2 minutes if possible to maintain quality and reduce fatigue. Keep interruptions under 10 seconds at all times.
- Use the AED as Soon as Available: Turn on the AED and follow its voice prompts. Apply pads to the bare chest as shown on the device. The AED will analyze the rhythm automatically. If a shock is advised, make sure no one is touching the person, then press the shock button. Resume compressions immediately after the shock.
- Continue Until Help Arrives or the Person Recovers: Keep performing CPR until professional emergency responders take over, the person shows clear signs of life (breathing, moving, or responding), or you are physically unable to continue.
How to Practice High-Quality CPR at Home?
Practicing high-quality CPR at home helps you build muscle memory, improve your technique, and stay prepared for real emergencies. While nothing replaces formal certification training, regular at-home practice can significantly improve your confidence and skill retention between courses.
Here is how to practice high quality cpr at home:
- Use a CPR manikin designed for home practice: It allows you to feel the resistance of realistic chest compression depth and see how proper hand placement works. Some models provide visual or audio feedback on compression rate and depth.
- Practice compression depth and rate regularly: Focus on pushing at least 2 inches deep on the center of the chest. Use a timer or metronome set to 100–120 beats per minute to stay within the recommended compression rate. Proper positioning and body mechanics are just as important as speed and depth.
- Review CPR videos from credible sources: Watch updated instructional videos from the American Heart Association or other certified organizations regularly. These videos reinforce the correct steps and highlight common mistakes to avoid.
- Practice the full sequence, not just compressions: Run through the entire CPR process, from checking responsiveness to delivering rescue breaths (if trained) and using a training AED if you have one at home. Practicing the complete sequence prepares you to act smoothly in a real emergency.
- Use mobile CPR training apps: Several apps provide step-by-step guidance, rhythm feedback, and performance tracking. Apps like CPR Tempo and PulsePoint AED help you practice compressions at the correct rate and give real-time feedback.
- Track your progress over time: Keep a simple log of your practice sessions. Note what felt right or wrong and track your progress over time, helping you build confidence and proper technique.
Common Mistakes to Avoid During High-Quality CPR
Even when people try their best, CPR often includes small but critical mistakes that can reduce the person’s chance of survival. Knowing what to avoid can make your efforts far more effective when every second matters.
- Compressing too shallow: This is the most common error. Many rescuers push only about 1 to 1.5 inches instead of the recommended 2 to 2.4 inches. Effective compressions need to be deeper than what feels comfortable or natural.
- Pushing too slowly: It is easy to underestimate the correct speed. Many people perform only 60 to 80 compressions per minute, but the goal is 100 to 120. Slow compressions move less blood and reduce the chance of survival.
- Leaning on the chest: Failing to let the chest fully rise between compressions keeps the heart from refilling with blood. Make sure you lift your weight completely off the chest after every push.
- Taking too long to switch rescuers: Switching rescuers is important to reduce the impact of rescuer fatigue during CPR, but it should be quick. The transition should take less than five seconds and should be planned during a breathing pause to avoid unnecessary interruptions.
- Excessive ventilation or breathing too hard: Over-ventilating is a common mistake. Blowing too forcefully or too long increases pressure in the chest and limits blood flow back to the heart. One second per breath is enough.
- Stopping compressions for too long: Any pause longer than 10 seconds can significantly reduce survival chances. Keep interruptions to an absolute minimum and get back to compressions as quickly as possible.
- Incorrect hand position: Hands placed too high, too low, or off to the side reduce compression effectiveness and increase the risk of injury. Your hands should be placed on the center of the chest, between the nipples, on the lower half of the breastbone.
- Giving up too soon: CPR often does not lead to an immediate response. Continue until professional help arrives or the person clearly shows signs of life. Some successful resuscitations take 20 to 30 minutes or longer.
How Can You Get Trained in High-Quality CPR?
You need hands-on training to learn proper CPR technique. Online videos and articles teach you the theory, but only physical practice on a manikin with real-time corrective feedback can teach you the correct depth, rate, and hand position. Some of the ways you can get trained in high-quality cpr are as follows;
- Take a Hands-On CPR Course: The American Heart Association and American Red Cross offer CPR classes nationwide. You can enroll in a certified CPR course to learn proper compression depth, rate, hand placement, and AED use through practical skills sessions.
- Look for courses that teach current guidelines: CPR guidelines update every five years based on new research. Make sure your course follows the latest American Heart Association guidelines.
- Practice on Manikins: A good course includes plenty of time practicing compressions on training manikins. It helps build muscle memory, making it easier to maintain correct depth, speed, and technique during real emergencies.
- Use feedback tools during training: Feedback devices show whether your compressions are deep and fast enough, helping you correct mistakes immediately and improve overall CPR quality.
- Train in realistic scenarios: Practicing CPR in simulated emergency situations prepares you to stay calm, focused, and effective when performing CPR under real-life stress.
- Train with a partner: Learning CPR together reinforces the training and gives you practice partners. Working with another rescuer improves teamwork, smooth role switching, and coordination, especially during two-rescuer CPR situations.
- Recertify and refresh your skills: Take refresher or recertification courses every two years to stay updated on CPR guidelines and keep your skills sharp and ready.
Equip Yourself with High-Quality CPR that Makes the Difference
High-quality CPR is a life-saving standard that directly determines survival outcomes in cardiac emergencies. In an emergency where every second counts, high quality cpr, which includes proper compression depth, rate, fraction, minimal interruption, and ventilation enhance blood flow to the brain and vital organs, increasing chances of victim survival. Organizations and individuals who prioritize high-quality CPR are not only improving outcomes but also setting a higher benchmark for emergency readiness and professional responsibility.
At CPR Lifeline, we are committed to equipping individuals, teams, and organizations with the skills that truly make a difference. We offer the American Heart Association’s HeartCode® courses designed around evidence-based guidelines, measurable performance metrics, and hands-on practice that builds confidence under pressure. Through a short 30-minute, in-person, hands-on skills check with a Voice Assisted Manikin (VAM), we ensure learners don’t just perform CPR, they perform it right. By training with CPR Lifeline, you invest in competence, compliance, and confidence, empowering yourself and your team to deliver high-quality CPR when lives depend on it.
Faqs
Keep doing CPR until the person shows signs of life, professional help arrives, an AED instructs you to stop, or you physically cannot continue. You should not stop CPR just because the person has not recovered. Successful resuscitation often takes 15 to 30 minutes of continuous high-quality CPR.
Yes, rib fractures occur in 30 to 50% of CPR cases, especially in older adults. Don’t let that stop you. Broken ribs can heal, but inadequate compressions can lead to brain death. Proper depth is far more important than avoiding fractures.
Hands-only CPR (compression-only) is nearly as effective as conventional CPR for adult cardiac arrest during the first several minutes. Although rescue breaths significantly improves outcome for prolonged resuscitation, drowning victims, children, and infants. If you can’t give rescue breaths, hands-only CPR is still far better than doing nothing.
You cannot accurately measure the effectiveness of CPR while it is being performed. Focus on proper technique and keep performing high-quality CPR until professional help arrives.
No. Good Samaritan laws protect anyone who attempts CPR in good faith during an emergency. You do not need certification to perform CPR, and you cannot be sued for trying to help.

Chris Peters
Chris Peters is a certified American Heart Association instructor and firefighter since 1996 with over 30 years of emergency response experience. After answering thousands of 911 calls, he founded CPR Lifeline to provide AHA-certified training that transforms bystanders into confident lifesavers who act decisively when seconds count